
It may be a bit unorthodox to post a tutorial on a health post month but I don't care. It says a picture that inspires me and there is nothing more inspiring than Pinterest. And, actually, it does relate to my health in the fact that I felt so good one weekend that I had enough strength to build it.
Here is my inspirational picture....
 |
| http://www.trianglehoneymoon.com/2010/11/01/how-to-make-an-upholstered-headboard/ |
So I decided to make it for myself.
Materials:
- 50' x 40' 1/4 inch ply wood. (I was worried about getting the right size because I don't have a saw to cut it but the nice men at Home Hardware cut it for me. I had to buy a big piece but they cut it to the dimensions I wanted. I even got to keep the extra pieces which will come in handy later ;) )
- 1.5 metres of fabric. (I sprung for upholstery fabric to make it look better.)
- 5 metres of batting. (You can do it with 3 but I wanted a more fuller look so I put an extra layer on. It was also on sale at Fabricland for only $3 a metre so that was a plus.)
- Staple gun.
- Staples.
- A few large buttons. (I used 5 that I had laying around in my button box. And it doesn't matter the colour because you are going to cover them later.)
- Needle.
- Thread.
- Hot glue gun.
- Glue.
- Scissors.
- Two Flush Mount Brackets. (I didn't end up using them because of the way the studs are in my wall but you may want to use them.)
- A few nails. (If you are going to stand it up like I did.)

Step 1: Lay the batting out on the floor in as many layers as you choose. I did three because the batting wasn't very thick. If yours is thicker you may need only one or two. And make sure you smooth them out very well so that your finished headboard doesn't have any bumps or lumps.

Step 2: Lay the plywood on top of the batting making sure you pull the batting taught underneath the wood and that you can see the batting around the edges of the wood.

Step 3: Trim the batting so that there is about three inches hanging out all around the plywood. Use the staple gun to staple the batting to the back of the ply wood. I cannot stress this enough, you need to pull tight before you staple and hold it tight while stapling to avoid buckles. I did the top, then bottom, then left, then right. It helps to keep it taught.

Step 4: Iron your fabric thoroughly.

Then employ steps 1-3 the same way to attach the fabric to the headboard. And you will be left with this....

And the front will look like this....

If you choose not to attach buttons then you can add the flush mount brackets or legs now. If not continue....
Step 5: Covering and attaching buttons. Get your button.

Step 6: Cut a circle of fabric about an inch bigger than the button.

Step 7: Thread needle around the outside of the fabric circle, place button in the middle, draw up edges around button and secure.


Voila! Finished button! Make 4 (or however many you are making) more....

Step 8: Measure out where you are going to put the buttons and place staples into the board under where your buttons are going to be placed.

Step 9: Use your hot glue gun to glue the covered buttons on top of the staples you just put in. And you're done! Just attach the flush mount brackets to the headboard and the wall according to the instructions and hang. Or nail your headboard to two pieces of wood and stand behind your bed frame. Once your bed is pushed up against it you can't even tell that it's on posts.
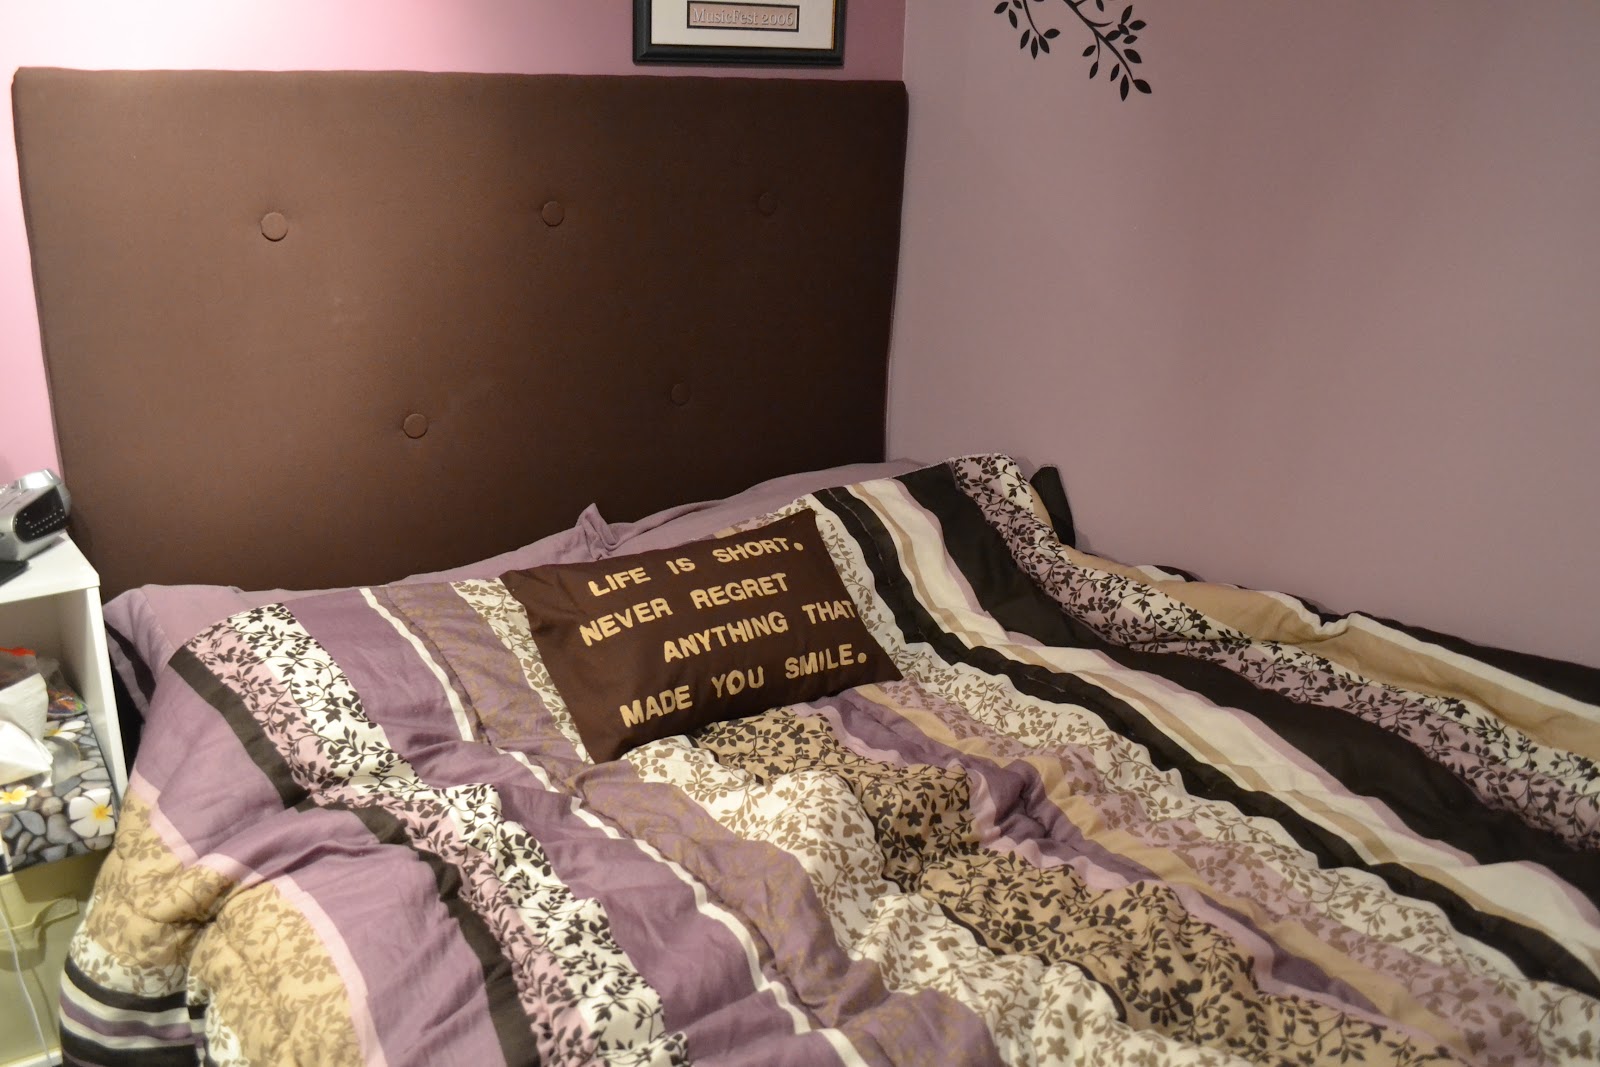

Step 10: If you have enough fabric left over make yourself a fancy matching pillow. Thank you again Pinterest!

Try it out for yourself!
:)